Translate

2019/01/25

Home Remedies for a Pimple in Ear That Actually Work
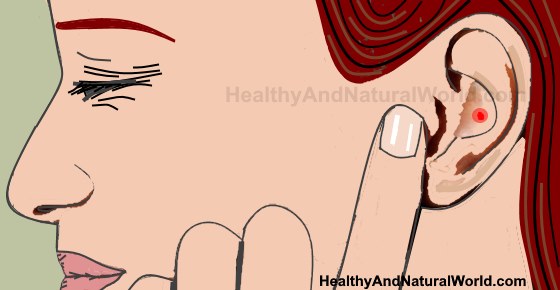
Home Remedies for a Pimple in Ear That Actually Work

Pimple in Ear: The Best Home Remedies

Pimples can develop in your ear the same way inflamed spots can affect other areas of your skin. Getting rid of painful red bumps from your ear is a challenge because the pimples can be difficult to reach. The good news is that there are many effective home remedies that can quickly deal with ear pimples and get rid of any infection.

Sometimes pimples, whiteheads, and blackheads can occur in the ear as a result of acne. However, other times blocked pores in your outer ear or inner ear can cause large bumps to form and sometimes even cysts. Some effective natural treatments for ear pimples include tea tree oil, witch hazel, and even honey to help reduce infection and inflammation.
In this article, you will find out how to treat annoying pimples that occur in and around your ear opening. You will also find out if it is safe to pop a pimple in your ear. First of all, let’s look at the reasons that pimples can affect your ear.

What Causes Pimples in Your Ear?

Acne and pimples develop when oil produced by the sebaceous glands in the skin (sebum) clog up pores. If dead skin cells accumulate in the pore, bacteria can infect the pore and an inflamed lump can appear that may or may not fill with pus.
According to the journal Clinics in Dermatology, your external ear and ear canal contain sebaceous glands and therefore inflammatory skin conditions can easily develop there. Researchers from India also found that acne can affect the area inside and around the ear.
Dr. Colin Tidy on Patient.info explains that infection in the skin can also cause a boil to occur in the ear. A common culprit for the skin infection in your ear is often damaging your ear tissue with a cotton bud or putting another object in your ear. The resulting boil can be itchy, cause irritation and even affect your hearing. In some cases, the boil bursts and drains discharge from the ear.

Types of pimples in your ear

According to the American Academy of Dermatology, blocked pores can cause a number of different kinds of pimples.  All of these pimples can also occur in the inner or external part of your ear.
Blackheads and whiteheads occur in the ears when sebum, dead skin cells, and bacteria block pores. If the skin pore stays open, you will get blackheads as the oil oxidizes with the air. Small white bumps will appear in your ear if the blocked pore closes up.
Pustules in the ear are larger pimples that become infected and fill with pus. These types of pimples are harder to get rid of from the ear. However, with some patience and antibacterial home remedies, you should be able to treat them effectively.
A small boil can appear in the ear canal if the skin becomes damaged and infected.

The Best Home Remedies for Pimples in Ear

All of the following home remedies can be used to treat all kinds of pimples in your ear. They will help to kill off any infection in your skin’s pores and help drain any pus and discharge that can be causing ear pain.

Tea tree oil

Tea tree oil is usually the number one choice when it comes to treating skin infections. The antibacterial properties of tea tree oil make it a great remedy to help quickly get rid of ear pimples. What’s more, tea tree oil is also a natural anti-inflammatory agent that will reduce the inflammation in skin bumps.
The Medical Journal of Australia reported that tea tree oil is just as effective as some pharmaceutical acne medications in helping to get rid of pimples. Other studies have confirmed that tea tree oil can help reduce symptoms of acne vulgaris and prevent outbreaks of acne.6
How to use tea tree oil for a pimple in the ear:
You can effectively use tea tree oil to get rid of an irritating pimple in your outer ear. Unlike other essential oils, tea tree oil can be used directly on the skin as a spot treatment. This is what you should do to promote quick healing of a pimple in your ear:
  1. Put 1-2 drops of tea tree oil on a cotton bud.
  2. Carefully apply the tea tree oil to the pimple in your outer ear. (Be very careful never to put the cotton swab too far into your ear).
  3. Repeat 2-3 times a day to help reduce the inflammation and get rid of the ear pimple.
To help boost the healing power of all the following natural recipes mentioned in this article, you can add a drop or 2 of tea tree oil to help treat acne.

Tea tree oil and coconut oil

A combination of tea tree oil and virgin coconut oil makes an effective acne treatmentfor pimples in your ear. One of the reasons that coconut oil works effectively against pimples is that it contains lauric acid which is antimicrobial.
A study published in the Journal of Investigative Dermatology found that lauric acid kills off the Propionibacterium acnes strain of bacteria. Lauric acid helped to reduce inflammation in acne flare-ups and it was suggested that it can be used as an effective alternative treatment for acne vulgaris.7
How to use:
To help soothe an inflamed pimple in your ear and get rid of the annoying spot for good, use a combination of tea tree oil and virgin coconut oil. This is what you should to treat your ear pimple:
  1. Mix 2-3 drops of tea tree oil with one tablespoon virgin coconut oil.
  2. Apply some coconut oil mixture to the zit in your ear with a cotton swab.
  3. Gently massage the oil into the pimple and the skin around it so the antibacterial properties of the remedy can go to work (remember to wash your hands first).
  4. Apply 2-3 times a day until the red bump in your ear has gone completely.

Witch hazel

Witch hazel can help to drain pus from an infected bump in your ear and help get rid of the pimple quickly. The benefit of witch hazel for acne pimples is that it is a natural astringent with antiseptic properties.
There have been various studies into the skin-healing properties of witch hazel. For example, the book Herbal Treatment for Dermatologic Disorders reported on a study showing that the astringent properties of witch hazel are useful for treating acne.
How to use:
It is very easy to use witch hazel to get rid of whiteheads, blackheads, and pimples in your ear. Here is how to make witch hazel toner for pimples in your ear.
  1. In 1 oz. witch hazel add 3 drops tea tree oil and 3 drops lavender oil.
  2. Apply the natural remedy to the pimple in your ear with a cotton ball.
  3. Allow to dry.
  4. Repeat 2-3 times a day to help get rid of pimples and prevent pores in your ear getting blocked up again.

Baking soda

There are a number of reasons that baking soda is good for treating acne and can help remove a pimple from your ear. Baking soda is a natural anti-inflammatory agent that can reduce the size of red bumps that acne cause. Baking soda also helps to dry up excess oil that causes clogged pores.
Another benefit of baking soda is that it also helps to kill off bacteria that can infect blocked pores. A study from 1997 reported that baking soda can destroy various strains of bacteria.
How to use:
Make a simple paste with baking soda and water to dry out the pimple in your ear and reduce irritation. To boost the antibacterial properties of this baking soda remedy, you can add a few drops of tea tree oil.
  1. Mix some water in baking soda to make a smooth paste.
  2. Add 2-3 drops of tea tree oil.
  3. Apply the paste to the pimple on your outer ear. (You shouldn’t put the paste in your ear canal or inner ear).
  4. Leave for 10-15 minutes before rinsing off with warm water.
For more ideas on how to get rid of acne quickly with baking soda, please read my complete guide on baking soda for acne and pimples.

Essential oils for ear pimples

Apart from tea tree oil, there are many great essential oils you can use to get rid of an inflamed bump in your ear. You can read more about the best 17 essential oils for acne, but here are 3 of the best for treating that annoying pimple in your ear.
To use these essential oils in treating a pimple in your ear, you should use the recipe of 1 tablespoon carrier oil with 2-3 drops of essential oil.
Lavender. A study published in the journal Molecules found that lavender essential oil has antibacterial activity against Propionibacterium acnes strain of bacteria. Lavender is also gentle enough to use directly on the ear pimple as a spot treatment.
Chamomile. Known for its soothing properties, chamomile essential oil can reduce inflammation in skin infections as well as helping to calm your nerves. A review on the medicinal properties of chamomile found that it has an antibacterial effect that also helps to soothe skin irritation, rashes, and sores.
Sandalwood. Research on the effectiveness of using sandalwood essential oil in acne remedies found that its anti-inflammatory activity helps to relieve acne. Sandalwood helped to lessen the severity of acne and reduce the number of pimples on the skin.

Apple cider vinegar (ACV)

You can use diluted raw unprocessed apple cider vinegar to get rid of a painful bumpin your ear. The acetic acid in apple cider vinegar acts as a chemical peel to dissolve layers of dead skin cells that can block pores to prevent whiteheads, blackheads, and zits. Also, the antiseptic nature of apple cider vinegar helps to remove bacteria and prevent more infections that cause pimples.
The journal Annals of Dermatology reported that excess sebum and P. acnes bacterial strain elevate the skin’s pH levels which can contribute to acne. The acidic properties of apple cider vinegar can help to lower the skin’s alkalinity and help treat acne pimples.
How to use:
A natural raw apple cider vinegar toner can help to get rid of an itchy, inflamed pimple in your ear. This is what you should do to use apple cider vinegar to help an ear pimple heal faster:
  1. Dilute apple cider vinegar with water in equal quantities.
  2. Using a cotton ball dipped in the apple cider vinegar remedy, place the ball on the pimple in your ear for a few minutes.
  3. It may sting a little. However, if it stings too much, rinse your ear with warm water. After a few applications, the stinging sensation should get better.
  4. Repeat 2-3 times a day until you no longer have whiteheads, blackheads or any other zit in your ear.

Aloe vera

You can help soothe a large boil in your ear by applying some healing aloe vera gel. It’s well known that aloe vera has the power to ease skin inflammation and speed up the healing time of wounds. Aloe vera is also well tolerated on sensitive skin and can help to quickly get rid of an ear pimple.
The Indian Journal of Dermatology reported that aloe vera has an anti-acne effect on the skin and can help to increase the production of collagen. Applying aloe vera to inflamed skin can also help to reduce bacterial infections and soothe itchiness.
Aloe vera is also effective at treating larger outbreaks of acne, for example, acne that covers your back.
All you have to do to use aloe vera to get rid of a large boil or a pimple from your ear is to regularly apply aloe vera gel several times a day. Continue doing this until the pimple is no longer red, itchy, and causing you discomfort.

Honey

Honey is a surprising natural acne treatment that can safely be used in your ear to get rid of a pimple. Apart from being a delicious food, honey also possesses medicinal properties and can be as effective as antibiotic treatments when treating acne outbreaks.
The journal BioMed Research International looked at the effect of honey on curing acne. It was found that honey had a positive effect in reducing sebum and P. acnes bacterial strains. This effect helps to limit bacterial growth in infected follicles.
How to use:
This is what you should do to make a pimple treatment to get rid of a bump or boil in your ear:
  1. Mix 1 teaspoon honey with one drop tea tree oil and one drop lavender oil.
  2. Apply the natural remedy to the pimple in your ear and leave for 10-20 minutes.
  3. Rinse with warm water.
  4. Use the home remedy several times a week on your ear pimple to help speed up the healing time.

How to get rid of blackheads from your ear

Most people who have pimples in their ears suffer from blackheads. Most of the natural treatments in this article, especially witch hazel and baking soda treatments, work well to lessen the number of blackheads in your ear.
There are a few other ways to get rid of blackheads that occur in your ear. One way to remove blackhead pimples from your ear is by steaming. This is what you should do:
  1. Pour some boiling water into a bowl and put in a few drops of lavender oil.
  2. Tilt you head to the side so that your ear is over the steam and cover your head with a towel.
  3. Keep your head in place for 5-10 minutes to allow the antibacterial effect of the lavender oil kill off bacteria and let the steam open your pores.
  4. Gently ease out the blackhead with clean fingers.

Should you pop a pimple in your ear?

It can be tempting to try and pop a large pus filled pimple in your ear. However, it is a bad idea to pop any kind of pimple, especially one in your ear.
Dr. Zakiya Rice on WebMD says that the pus inside a large pimple is full of grime, oil, and acne bacteria.15 If the bacteria ooze out into your inner ear, it could cause an ear infection which can be difficult to treat.
Dr. Rice also warns that squeezing and picking at a pimple could just push the infection further into your skin causing, even more inflammation, infection, and swelling.
The advice when tempted to pop a pimple in your ear is simple: don’t do it, but be patient and use the natural remedies for getting rid of pimples that are mentioned on this page.

How to prevent pimples in your ear

Of course, it is always easier to prevent pores in your ears clogging up and becoming infected pimples. Here are some great ways to avoid the irritation of a red, itchy bump causing discomfort in your inner or outer ear:
  • Always wash your hand before touching your ears.
  • Don’t use cotton buds or any other object to clean your ear canal. This can force germs in your ear and cause a boil or pimple to develop.
  • Clean any ear buds, ear plugs or headphones that you use weekly with tea tree oil to remove any bacteria from them.
  • Dry your ears after every shower to remove excess oil and prevent sebum clogging up the open pores.
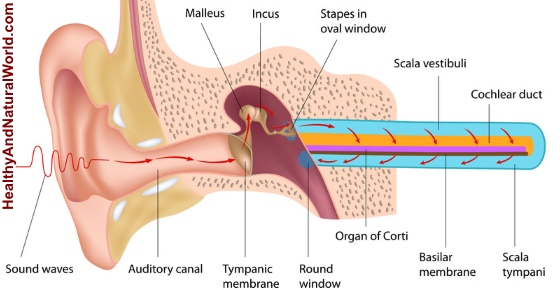
Тhis Will Make You Stop Cleaning Inside Your Ears (According to Doctors)

This Will Make You Stop Cleaning Inside Your Ears (According to Doctors)

This Will Make You Stop Cleaning Inside Your Ears

Many people regularly clean their ears with the best intentions of keeping them clean and healthy. However, our ears are not designed for cleaning. In fact, they have their own hygienic regime in place, and by sticking objects into the ear, you are only disrupting this natural process. Or worse, causing an injury.


The American Academy of Otolaryngology – Head and Neck Surgery (AAO-HNSF), warns against the use of cotton-tipped applicators and the habit of probing into your ears. On their official website, they connect the over-zealous ear cleaning with the risk of hearing loss.
Ear wax, medically known as cerumen, is a healthy feature of your ears and acts as a self-cleaning agent. It has protective, lubricating and anti-bacterial characteristics.
The ear wax migrates from the ear drum to the ear opening, cleaning the ear canal, and then drying and falling out.
This is a self-regulating process and in normal circumstances, there is no need to interfere. If there is an absence of ear wax, the ears become dry and itchy.

What Happens When You Use Cotton Swabs to Clean Your Ears?

When you use cotton swabs, you are actually pushing the wax deeper into your ear, and into the area where it shouldn’t be. It can get stuck and blocked against the ear drum, which can cause all sorts of complications.
Fungus, bacteria and viruses from the outer ear get pushed into the ear and can cause infections, which are extremely painful.
If the wax is jammed deep inside the ear canal, it can cause hearing loss.
If it gets shoved even further, it can damage the ear drum and result in a rupture.

Do You Actually Need To Clean Your Ear?


Ideally, your ears should never be cleaned. By cleaning the inside of the ear you are only creating a vicious cycle.
Dr. Douglas Backous, M.D., chair of the AAO-HNSF and director of hearing and skull base surgery at Swedish Neuroscience Institute in Seattle, explains that when you constantly rub the skin of your ears, a lot of histamine gets released. This makes the skin irritated and inflamed. And the more you scratch, the more it itches.
The only time that ear wax should be cleaned is when you’ve been assessed by a doctor, who has noticed wax accumulation (cerumen impaction).
The condition presents with symptoms such as earache, hearing loss, tinnitus, itching, odor and discharge. The ear should then be cleaned by a medical professional.
If you do want to continue cleaning your ears, do not insert anything into the inner ear!
Clean only the external ear (which is also the recommendation of cotton swabs manufacturers), using a cloth.
You can also use gentle at-home irrigation if you really have to or just cannot leave your ears alone. Dr. Backous recommends a mixture of one part white vinegar, one part rubbing alcohol and one part tap water. Make sure it’s at body temperature and use a few drops in each ear.
The bottom line is that you shouldn’t be putting anything into your ear. Just let the body do its magic!
And if you or your child suffers from ear infection, you can also try the following treatments to remove wax from your ears.

Other Options for Ear Wax Removal

If your ears are clogged due to wax accumulation, there are few easy ways to get rid of it naturally and safely to relieve the blockage. One word of warning: do not use any of these treatments if you have a hole in your eardrum.

Olive oil

To get rid of the wax that is clogging your ears, use warm olive oil. The soothing properties of olive oil will remove any discomfort from your ear and help the wax to drain quickly and clear the blocked ear.
Here is how to do it
  • Warm some extra-virgin olive oil.
  • Put a few drops in the blocked ear using a dropper.
  • Keep your head sideways to help the oil settle.
  • Let the oil go to work for a few minutes to soften the ear wax.
  • Using a cotton bud, gently and carefully remove the loosened wax from the outer part of the ear.
  • Use the remedy as often as necessary to get rid of all the excess wax from your ears.

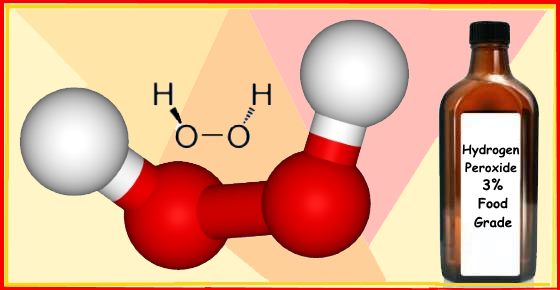
3% Food Grade Hydrogen peroxide

Food grade hydrogen peroxide can help you get rid of a buildup of ear wax quickly and effectively which can help you to unplug your ear.
Hydrogen peroxide has an antiseptic effect that can help to prevent skin infections. According to doctors at WebMD, the bubbling action helps to bring up dirt and loosen it.
Researchers from Harvard Medical School recommend using 3% hydrogen peroxide for ear wax removal.
If you want to get rid of a congested ear using hydrogen peroxide, this is what you should do:
  • Put two drops of 3% food grade hydrogen peroxide in your clogged ear. Don’t exceed that amount or you could damage your eardrum.
  • Wait until you hear a fizzing sound (it should take a few minutes).
  • Let it fizz for few minutes until it stops.
  • Tilt your head to the side, so that the solution and ear wax can drip out.
Do this every time you need to unclog your ears from excess ear wax.


Food Grade Hydrogen Peroxide: Extraordinary Uses, Dangers and More (Ultimate Guide)

Food Grade Hydrogen Peroxide: Extraordinary Uses, Dangers and More (Ultimate Guide)


Food Grade Hydrogen Peroxide: Uses, Dangers and More

Food grade hydrogen peroxide (H2O2) has many uses around the home and commercially. 3% hydrogen peroxide is usually used to disinfect surfaces, whiten teeth, and used as a mouthwash. Hydrogen peroxide also comes in other grades that are stronger than 3%. For example, the food industry often uses 35% food grade hydrogen peroxide for various bleaching processes and to kill off germs.

What is 35 Percent Food Grade Hydrogen Peroxide?

Food grade hydrogen peroxide that is sold as a 35% solution is a mixture of additive-free hydrogen peroxide and 65% water.
The chemical name of hydrogen peroxide is H2Owhich is a combination of hydrogen and oxygen particles. Hydrogen peroxide is a colorless solution with strong oxidizing properties.
The National Center for Biotechnology Information says that 35% hydrogen peroxide is classed as commercial strength. The reason why it is called food grade is that the H2O2solution doesn’t contain any additives or stabilizers.
The British Dental Journal says that in clinical settings 35% hydrogen peroxide is powerful enough to be used to whiten teeth. However, this is always carried out by a qualified dental technician. There are also reports that using 35% hydrogen peroxide to whiten teeth can cause them to become more sensitive. 
It doesn’t matter if hydrogen peroxide is classed as “food grade,” you shouldn’t use 35 percent food grade hydrogen peroxide at home.

What is 3 Percent Hydrogen Peroxide?

3% food grade hydrogen peroxide is sold in many drugstores, supermarkets, and online as an over-the-counter antiseptic solution.
According to the U.S. National Library of Medicine, purified water are added to 3% hydrogen peroxide. You can use 3% hydrogen peroxide to kill off germs and prevent oral infections. 
Doctors warn that 3% H2Oshould never be ingested and you shouldn’t use the solution for longer than a week.
However, when used properly, there are many uses for 3% food grade hydrogen peroxide around the home. Some of the uses of hydrogen peroxide include use as an antiseptic mouthwash, surface disinfectant, toothbrush cleanser, and an antibacterial rinse for vegetables.
Here are some of the best uses of hydrogen peroxide.

Hydrogen Peroxide Mouthwash (Gargling with Hydrogen Peroxide)

One of the popular reasons to use food grade 3% hydrogen peroxide is to gargle with diluted hydrogen peroxide.
As with any grade of hydrogen peroxide – 35% hydrogen peroxide, 12% hydrogen peroxide, or 3% hydrogen peroxide – you should be careful not to swallow any of the solution.
Are there any scientific studies backing up the use of hydrogen peroxide as a mouthwash? According to the Australian Dental Journal, using a low concentration of hydrogen peroxide mouthwash over long periods of time is a safe practice. Rinsing your mouth with an H2O2 solution helps to kill off bacteria without damaging teeth or gums.
There is also evidence that 3% food grade hydrogen peroxide can be good for keeping your toothbrush free from germs. One study found that 3 percent hydrogen peroxide was an effective toothbrush disinfectant. In fact, the hydrogen peroxide was more effective than commercially-produced dental products. 
When gargling with hydrogen peroxide, it is important to make sure and not swallow any of the solution, even if the food grade hydrogen peroxide solution is less than 3%.
Doctors in 2017 reported on a case of a woman complaining about gastritis and colitis which was the result of swallowing 3% hydrogen peroxide. Although a 3% H2O2solution is generally regarded as nontoxic, doctors advise against ingesting it. 
Let’s look at some ways you can safely use 3% hydrogen peroxide to keep your mouth free from germs and bacteria.

How to rinse your mouth with hydrogen peroxide

You can easily make a hydrogen peroxide gargle at home to help kill off germs from your mouth.
To safely gargle with hydrogen peroxide you will need to start with a bottle of food grade 3% hydrogen peroxide. You should be able to find this in your local drugstore. This is how to gargle with the peroxide mouthwash:
  1. Dilute 1-part 3% hydrogen peroxide with 2-parts water. This will give you a low concentration of 1% hydrogen peroxide.
  2. Take a small mouthful of the hydrogen peroxide mouthwash, and swish around your mouth for 60 seconds. Then spit out.

Gargling with hydrogen peroxide can help whiten teeth

You may find that regularly using a low concentration of hydrogen peroxide (less than 3%) will result in having whiter, brighter teeth.
Research from 2014 on the teeth-whitening effect of 1.5% hydrogen peroxide found that it can act as a bleaching agent on teeth. The research found that the hydrogen peroxide solution lightened teeth. The solution was used for 4 minutes a day for 28 days.
One study from 2015 found that the best results from using hydrogen peroxide to whiten teeth is to use the solution over a few months. Researchers found that hydrogen peroxide helps to break down darkened molecules that can cause teeth to lose their white color.
You can combine baking soda and hydrogen peroxide to whiten your teeth. See detailed instructions in this article.

Gargling with hydrogen peroxide helps to cure a sore throat

Because hydrogen peroxide even at 3% concentrations has an antibacterial effect, gargling with hydrogen peroxide can also help cure a sore throat.
You should make your hydrogen peroxide gargle for a sore throat with a 1% hydrogen peroxide solution. For this, you should mix 1 part of 3% food hydrogen peroxide (H2O2) and 2 parts of water. Gargle for up to 60 seconds, taking care not to swallow any of the solution.
If you have trouble gargling or you have young children who have a sore throat, you should use a salt gargle instead. This will prevent any irritation to your esophagus by inadvertently swallowing the peroxide solution.
Here are the instructions to make your own saline gargle to break up mucus in your throat and help kill off throat infections.
  • Dissolve ½ to 1 teaspoon of salt in an 8-oz. glass of warm water.
  • Gargle the salt solution 3 or 4 times a day to help soothe the pain and irritation at the back of your mouth.
For added effect, you could add a teaspoon of turmeric to help the infection clear quicker.

Gargling with hydrogen peroxide keeps your mouth free of bacteria

Using a hydrogen peroxide mouthwash to gargle can be part of your daily dental routine to keep your breath fresh and mouth free from bacteria.
Dentists say that good oral health requires reducing levels of harmful bacteria in your mouth. Bacteria can lead to the buildup of plaque and is one of the leading causes of gum disease. 
The International Journal of Dental Hygiene published the results of studies on using hydrogen peroxide mouthwashes. A systematic review of over 220 medical articles found that rinsing your mouth with hydrogen peroxide helps to reduce plaque and prevent gingivitis (gum disease).

Other Uses of Food Grade 3% Hydrogen Peroxide

Bleach Alternative to Whiten Clothes

Food grade hydrogen peroxide can act like bleach, which makes it a perfect alternative to keep your clothes white. 
Clothes tend to wear out faster when using bleach, however low concentration of hydrogen peroxide won’t do that and it doesn’t leave the bad odor that bleach does. Just add one cup of hydrogen peroxide into a washer load of whites. You can also find more natural bleach alternatives in my previous article.

Stain Remover for Clothes

You can use hydrogen peroxide to remove stains from your clothes or carpet if used fairly soon. (21) But watch out, hydrogen peroxide can bleach out the fabric as mentioned above, so dab it on an invisible test spot first to see what happens.
Pour 3% food grade hydrogen peroxide directly on the spot to remove stains. Let it set and bubble for 1-2 minutes, rub and rinse with cold water and soap before throwing them in the washing machine. Repeat if necessary.

Surface Cleaner

Hydrogen peroxide can be used in many ways in your kitchen and at home to remove stains and kill germs.
A study from 2016 mentions that hydrogen peroxide-based liquid surface disinfectants are effective alternatives to disinfectants currently in widespread use in hospitals.
These products were also used as spray to reduce pathogens that cause contamination on soft surfaces such as bedside curtains in hospitals.
You can use hydrogen peroxide at home to clean kitchen counters, floor cleaning (including grout cleaning), table top cleaner, disinfect the inside of your fridge, as well as cleaning your windows.
Just add the 3% food grade hydrogen peroxide into a spray bottle. Spray on the target surface and wipe off, just as a normal household cleaner.
If you want to sanitize, leave the hydrogen peroxide for a longer period before rinsing it off.
You can also find here how to make sanitizing natural household cleaner using essential oils.

3% Hydrogen Peroxide Fights Mold and Mildew in Your Bathroom

Food grade hydrogen peroxide is very effective against mold and mildew. For example a study from 2011 found that hydrogen peroxide mist was effective in decontaminating air in rooms infested with mold after water damage. In another study, hydrogen peroxide was used to reduce the occurrence of mold on food packaging to improve sterilization. 
In a similar way as in the kitchen cleaner, add 3% hydrogen peroxide to a spraying bottle and apply directly to the problem areas to remove mold and mildew. Let it set for a few minutes to kill the germs, mold and mildew and wipe them up for a clean and fresh smelling bathroom.

Use Food Grade Hydrogen Peroxide to Remove Pesticides From Fruits and Vegetables

Hydrogen peroxide is also used to remove pesticides and reduce their concentration. 
To remove bacteria and pesticides from your fruit or vegetables, add ¼ cup 3% food grade hydrogen peroxide to a full sink and soak the produce for 20 to 30 minutes. Rinse each piece with cold tap water and dry. If you don’t have the time to wait, spray your fruit or veggies with a 3% food-grade peroxide solution, let stand for a few minutes, rinse and dry.

Remove Earwax with Hydrogen Peroxide

Food grade hydrogen peroxide is an effective home remedy for ear wax removal. Hydrogen peroxide drops work by releasing oxygen to soften and remove ear wax and also have a weak antibacterial effect.
If you suffer from a painful or irritating wax build-up, you can use an eye dropper to put 2 drops of hydrogen peroxide into the ear to soften the earwax. Let it set for a minute or so and then use a syringe and carefully flush out with warm water and dry your ear.
Food grade hydrogen peroxide is also one of the home remedies for getting rid of ear infection.

Treat Toenail Fungus, Warts and Skin Tags

Food grade hydrogen peroxide can treat toenail fungus, warts and skin tags.
To treat toenail fungus soak toes or fingers in a 50/50 solution of 3% food grade hydrogen peroxide and water every day and the fungus will be history in no time. Also read my article about natural cure for toenail fungus.
If you suffer from warts or skin tags you can use over-the-counter products to treat warts, or visit a dermatologist that can perform wart or skin tag treatment and removal techniques, but you can also treat these two with hydrogen peroxide. You can find all the details and instructions in the article how to remove skin tags and warts with hydrogen peroxide.

Hair Lightening

Hydrogen peroxide is not only used to bleach clothing, it can be used to lighten your hair as well.
Again dilute 3% hydrogen peroxide with water (50/50) and spray it on wet hair and comb it through to lighten your hair gradually and without the use of harsh chemicals. Just be aware that high concentration of hydrogen peroxide and longer time of bleach treatment may cause hair damage.

Improve Root System of Plants

Hydrogen peroxides adds more oxygen to the soil, which allows plants to take up more nutrients and water to boost the plant’s growth and encourages the development of a healthy and strong root system.
It also kills harmful bacteria and fungus presented in the soil. Just mix 2 teaspoons of 35% food grade peroxide in 1 gallon of water to water your plants. Or use a 3% solution to spray your plants.

Home Remedy for Bacterial Vaginosis (BV)

Food grade hydrogen peroxide (3%) can help to eliminate bacterial vaginosis. It helps to eliminate the bad bacteria by causing it to oxidize. According to doctors, there are no bacteria or fungi that can develop resistance to hydrogen peroxide.
A study published in the Journal of the Medical Association of Thailand found that hydrogen peroxide was able to cure just over 60% of women who had bacterial vaginosis.
You can mix equal parts of water with 3% hydrogen peroxide. Either soak a tampon in the liquid and insert in your vagina for 20-30 minutes or use a douche to help treat bacterial vaginosis and reduce itching. For more information please read the article about the best home remedies for bacterial vaginosis.

Get Rid of Cold Sores (fever blisters) Using 3% Hydrogen Peroxide

Hydrogen Peroxide is a powerful antibacterial and antiviral compound which can help kill the virus that causes fever blisters.
In a study published in the American Journal of Infection Control, hydrogen peroxide was shown to be able to kill the HSV1 virus that causes fever blisters. (31)
To heal a fever blister you can add a few drops of 3% food grade hydrogen peroxide to a cotton swab and gently wipe it over the affected area. This may sting a little, but this is the natural astringent properties of hydrogen peroxide which are helping to kill the infection. Repeat this 2 to 3 times a day until your fever blister has disappeared completely.

Home Remedy for the Removal of Red Moles (Cherry Angiomas)

Hydrogen peroxide may be helpful in removing cherry angiomas (red moles). Hydrogen peroxide can be used to help get rid of skin tags and warts naturally because it is a natural bleaching agent. But before using it, make sure to visit your doctor to have the mole checked.
For more information, read the article on how to get rid of red moles on skin.

Medical Uses for 35 Percent Hydrogen Peroxide

Although you can use 3% hydrogen peroxide around the home and to improve your dental health, some websites promote the use of 35% food grade hydrogen peroxide.
Among some of the unsupported claims of using higher concentrations of H2Oare getting rid of nail and foot fungus, treating ear infections, and eliminating skin mites.
However, as mentioned previously, you shouldn’t use 35% food grade hydrogen peroxide at home.

Can Hydrogen Peroxide Cure Cancer?

Is there any truth to the claims that hydrogen peroxide can be used as a cure for cancer?
Some websites claim that hydrogen peroxide is an alternative cancer treatment because it contains oxygen. It is claimed that cancer cells thrive in low oxygen environments and oxygenating tumors helps to kill off cancer cells. This was based on research carried out in the 1930s by Otto Heinrich Warburg.
Because of this theory, some people claim that you can drink or inject 35% hydrogen peroxide solutions to cure cancer.

Does modern scientific research backup claims that hydrogen peroxide cures cancer?

There are no recent scientific studies that show you can use hydrogen peroxide in any solution to treat cancer.
In fact, studies point to the fact that hydrogen peroxide therapy (called oxymedicine) is probably non-effective in cancer treatment. There is even evidence that hydrogen peroxide could promote the spread of cancer.
The journal Cell Cycle in 2011 found that cancer cells actually produce their own hydrogen peroxide. Scientists discovered that applying hydrogen peroxide to cancer cells can actually help to “feed” them and promote their spread (metastasis). They also found that hydrogen peroxide could also cause cell damage and result in the development of tumors. 
Information published by the American Cancer Society in 1992 reported on the results of a number of scientific studies. Their conclusion was that there is no evidence that oxymedicine is effective for treating any chronic disease, let alone cancer. 
There are also other serious health implications of self-administering food grade 35 percent hydrogen peroxide. The U.S. Food and Drug Administration (FDA) warns that ingesting 35% hydrogen peroxide can cause serious harm or death. It is also illegal to promote 35% H2O2 therapy as a cure for cancer, AIDS, or any other chronic illness.

Hydrogen Peroxide on the Skin – Is it Safe?

Hydrogen peroxide 3% is generally regarded as safe to use and has many uses around the home and in healthcare.
According to the National Capital Poison Center, 3% food grade hydrogen peroxide can be irritating to the eyes and skin. (14) However, many people claim that putting 3% hydrogen peroxide on wounds can help to heal them quicker.
But should you put hydrogen peroxide on your skin to prevent infections and help wounds heal faster?
Some studies indicate that doctors can use 3% hydrogen peroxide to help treat wounds. However, hydrogen peroxide is often used as a solution with other ingredients and used in a clinical setting. 
When it comes to treating wounds at home, doctors generally advise against using household 3% hydrogen peroxide due to its irritant nature. The Mayo Clinic advises not to use hydrogen peroxide to rinse wounds.
In fact, there are many reasons not to put hydrogen peroxide on your skin to heal wounds. Apart from the 3% solution irritating your wound even further, doctors from WebMD warn that hydrogen peroxide could damage wound tissue even more.
To clean a wound and prevent infection, doctors recommend washing the damaged skin with plenty of soap and water and then covering with sterile gauze. 
So, in short, you should avoid putting food grade 3% hydrogen peroxide on your skin to remove germs or clean wounds.

The Dangers of Exposure to Food Grade Hydrogen Peroxide

Food grade hydrogen peroxide, even in concentrations as low as 3%, can cause some irritation to your skin, eyes, airways (if you breathe it in), or esophagus (if you swallow it).
The Journal of Toxicology reports that ingesting 3% hydrogen peroxide can cause irritation to the gastric lining. There have even been reports of long-term ingestion of hydrogen peroxide causing gastric ulcers.
You should also remember that 3% hydrogen peroxide can cause a lot of foam when it comes into contact with the skin. It could even cause a lot of foaming at the mouth if it is ingested. However, this is usually a benign chemical reaction and is usually nothing to worry about.
Generally, swallowing 3% household hydrogen peroxide causes gastric upset, vomiting, and mouth irritation. If this happens, you should drink some milk or water to help dilute the solution.
Consuming large amounts of food grade hydrogen peroxide can result in more serious gastric upset and even burn the stomach lining. This requires emergency medical attention.
Exposure to 35% food grade hydrogen peroxide is more serious and can even be fatal. Ingesting strong food grade hydrogen peroxide can result in serious injury to the gastric lining and gas formation in the veins. This type of exposure can cause a stroke, ulcers, and life-threatening reactions.

Spoon of This Miracle Plant to Prevent Dementia

  Spoon of This Miracle Plant to Prevent Dementia Did you know that mint, a simple yet powerful herb, can help protect your brain and potent...